
Let's Get "Startered"! (2)
- bridgetscooking
- Feb 2, 2025
- 5 min read
Updated: Mar 13, 2025

Hello again gentle reader. Hope you can forgive the silly play on words...I'm excited to share the steps to create your very own starter. Of course if you know someone that already bakes with sourdough, they may be willing to share some starter with you. If that's your preference, you can skip to the section on maintaining your starter. If you want to start from "scratch" then let's go!
The book I referenced when I began my starter is called "Heritage Baking" by Ellen King. My husband gifted me this book one Christmas and I used it as my key reference when I began this journey. I will adjust the directions from the book just a bit, based on what worked best for me. You will need 200 grams of lukewarm water (easy to measure using your scale. The scale measures ounces and grams. For this recipe grams is how you want to set your scale.). Lukewarm is about 77 to 78 degrees F. An instant read thermometer is handy to check for the right temperature. I use filtered water from my refrigerator, but bottled water or your tap could work just as well. You will also need King Arthur whole wheat flour. This is the flour you need for beginning your starter. King Arthur all purpose flour is what you will use for on-going feedings. I use the whole wheat flour in many of my recipes, so don't worry about wasting that package of whole wheat.
Place your Weck glass container on your scale set to grams. Pour the lukewarm water into the container until it measures 200 grams. Then reset your scale to zero and add 200 grams of the whole wheat flour. Use a sturdy spatula and stir well until all flour is absorbed; moistened and slightly sticky. You should not see any traces of flour. Cover the container loosely, I just place the glass lid with the rubber gasket on top of the jar. It's not sealed (with the metal clips) at this point. Store on your kitchen counter away from sunlight at room temperature. If it's chilly in the house I may turn on the cabinet lights or stove light to add some warmth. Okay that's it for day !. Great job!

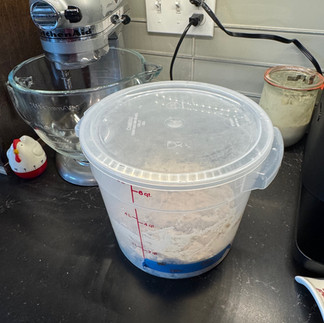
Recently fed starter Day 2 you will want to check for any activity at all. You might see a bubble or two, or a hole in the "starter" that resulted from a popped bubble. Or you might not see any activity yet, that's okay, just wait another day or two. Either way let it sit until day 3.
Day 3 you will want to check your starter for activity again. If you have any sign of activity, it's time to "feed your pet". If no activity is apparent, just let it sit for another day. Don't look for dramatic activity at this point, any little bubble or hole counts! Get our your scale. Set the jar on your scale, it had 400 grams of starter in it (200 grams of water and 200 grams of flour gives you 400 grams of starter). You will need to remove 200 grams of starter directly into your trash or compost bin. You will not reuse this beginning discard. One your starter is good and active you will want to use that precious discard. For now, it's not ready to be used for baking. To feed the starter, you will 100 grams of lukewarm water and 100 grams of King Arthur all purpose flour. Mix as outlined above and cover loosely with the glass lid and gasket.I found that using all purpose flour in subsequent feedings results in a more active starter than feeding with whole wheat. It makes a lighter loaf, But we're not ready to start baking yet, just a note to self.
Day 4 or 5 through day 9 you will continue feeding your starter at about the same time each about day (don't worry if you are off an hour or two, this starter will be forgiving I've found). Each day you will discard 200 grams and feed with 100 grams of the lukewarm water and 100 grams of all purpose flour. By day 6 or 7 you should start to notice a more sour smell. The starter will smell the most sour just before feeding, the smell dissipates as the starter is busy eating. To ensure the starter is headed in the right direction, check on it after about 3 hours. It should look bubbly and have risen in the jar by 1 to 2 inches. You will need to feed your starter at least 10-14 days before it's ready for baking. You will know it's ready if it passes the "float test". Don't stress if it takes a little longer to be ready, my first starter took just over 2 weeks until it passed the test.
The float test! Fill a bowl with about 4 inches of room temperature water., Take 1 tablespoon of starter and place it on top of the water. If it sinks to the bottom, it's not ready to use for baking. Try again in 30 to 45 minutes, if it floats like a buoy then it is ready to be used! If your starter is bubbly and raising each day stay with it, keep discarding and feeding until it passes the float test. If it isn't "active" at all you may need to start over. I doubt that will happen if you have been faithfully feeding each day.
Maintaining your starter is easy. Continue to feed daily if you are baking 1 or more times a week. (Remember to replace what you remove. If you used 200 grams of starter then feed your starter with 100 grams of water and 100 grams of flour.) If you are baking less, it's fine. Feed it, let it eat for a few hours (3 or 4 is fine) and then put in the refrigerator. I make sure I feed my starter at least one a week, if I'm not baking regularly. It's critical to store the starter in the refrigerator if you don't feed daily. You might wonder what to do if you go on vacation. No problem. Just feed it right before you go, keep in the refrigerator with the lid, gasket and clamps in place. When you get home dump a majority of the starter and begin feeding daily. I make sure to feed for several days prior to using for baking so the starter has a chance to reestablish itself.
So let's get to baking! Check our my next post for some of my favorite recipes. Enjoy!


Comments